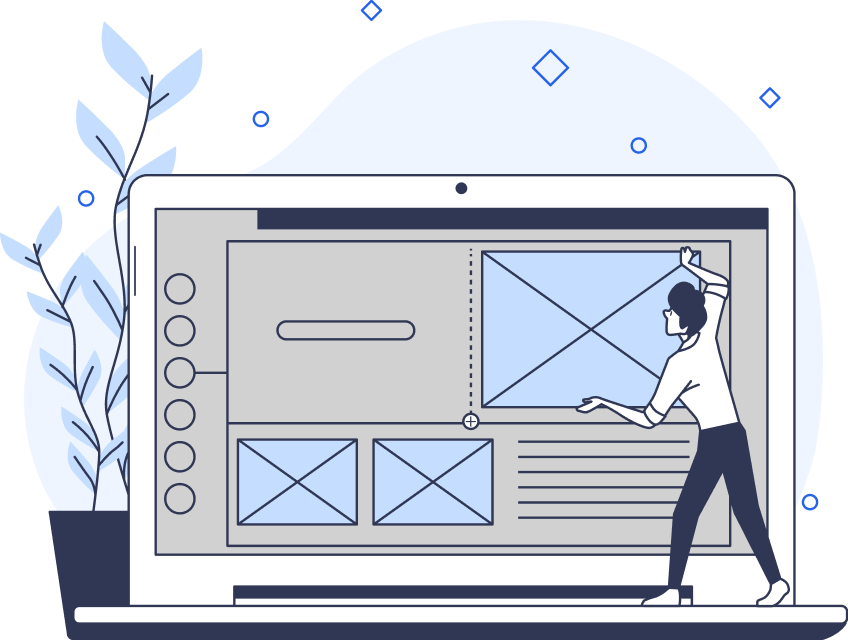
If you’re familiar with the UX design process, then you know how important user flows and user journeys are. Using a user flow diagram alongside a user journey map is crucial when creating an excellent customer experience.
But regardless of how much they complement each other, it’s important to know that they aren’t the same thing. And knowing how they differ will help you maximize the usefulness of both techniques.
For that reason, we’ll settle the user flow vs user journey matter in today’s guide.

What Is a User Flow?
We can’t address the user journey vs user flow issue without first discussing the two, respectively. So, it’s time to ask the basic questions, like, ‘What is a user flow?’
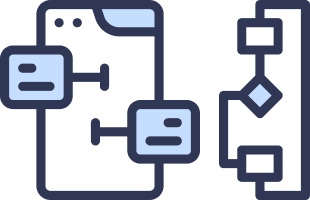
A user flow chart or diagram visualizes the path/steps that users will take to complete in-product tasks. Both design and product teams use user flow diagrams to create intuitive, user-centric user interfaces within digital products.
How?
Unlike their task-oriented counterparts (task flows), user flows focus on specific users. That’s why user personas and user flows are nearly always side by side.
Where task flows aim to understand one potential path a user can take, user flows consider all potential paths. For that reason, you can expect to see decision points in user flows because designers have to consider variability.
Ultimately, user flows reveal the optimal route between the user’s initial contact point and the final user action (conversion).
The Key Elements of a User Flow Chart
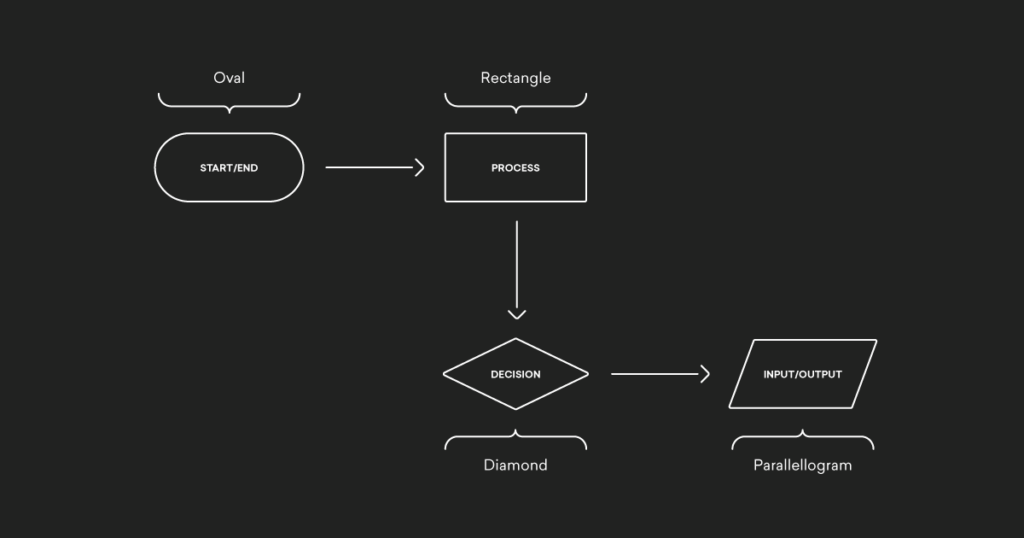
If you’re unfamiliar with the structure of a user flow chart, it must look like a random assortment of shapes. But these shapes have meaning, and it’s crucial that you know what they represent. Let’s take a look.
- Ovals represent the start and end of the user flow.
- Rectangles symbolize the process steps that the user must complete in order to progress through the user flow.
- Diamonds indicate a stage in the user flow where a user must make a decision.
- Parallelograms depict a place in the user flow where a user must input something like a phone number.
- Arrows represent the directional flow of the user’s path.
How To Create a User Flow Chart Effectively
Before we shift focus to user journey mapping, it’s good to learn how to master user flow design first. After all, settling the user flow vs journey map debate won’t help you if you can’t create either of them.
So, to help you out, we’ve revealed how to create a user flow below.
Tip: It may also be worth looking into user flow templates!
1. Conducting User Research
You must start your user flow creation process with user research. With the right UX research methods, you can reveal the desires, motivations, expectations, needs, and pain points of real users.
By knowing what goals your users have, you can mold your user flow around said goals. As a result, your user flow will not contain unnecessary steps that elongate it and ultimately frustrate your users.
2. Bridging the Gap Between Your Goals and Your Users’ Goals
Now, you need to find some common ground between the user goals you’ve just discovered and your own goals.
Nearly every business’s goal ends with conversions, whether the user makes a purchase or signs up for something. But, the thing is that, on the surface, these goals don’t always match what the user wants from your product.
So, by helping your users achieve their goals first, you’ll also enable them to help you fulfill yours.
Overall, you need to provide your users with what they want to persuade them to take the desired final action.

3. Identifying Your Users’ Entry Points
Let’s now focus on the start of your user flows – the entry points.
Users can discover websites and mobile apps from all sorts of different places, including social media and paid advertisements.
You need to figure out how your users find your products. By doing so, you’ll identify the needs of users who follow alternative user paths.
You’ll also find out what information those users need to reach the final interaction of the flow. For instance, users who find your products through social media may not know about your brand and need extra information.
Simultaneously, users who directly search for your brand may know what they want immediately and navigate your product as so.
Regardless of how your users find your brand, you must provide the necessary information to guide them through the flow.
4. Preparing Your User Flow Outline
From here, you need to create a rough outline of your user flow.
Add in your entry points, process steps, decision points, and the desired final action. Mapping out your user flow like this will help you find any areas of friction before you create your flow.
5. Bringing Your User Flow To Life
Lastly, all you need to do is add the correct symbols, labels, and colors to your user flow. Remember to consult your outline to make sure you haven’t missed any crucial steps.
It’s also wise to design with visual consistency in mind – your user flows should be simple, cohesive, and readable to effectively guide users toward their goals.
Once you’re happy with your user flows, you can present them to other designers, web developers, and stakeholders for feedback. You can then use this feedback to iterate and improve upon your user flows, if necessary.
What Is a User Journey?
It’s time to flip the coin – what is a user journey?
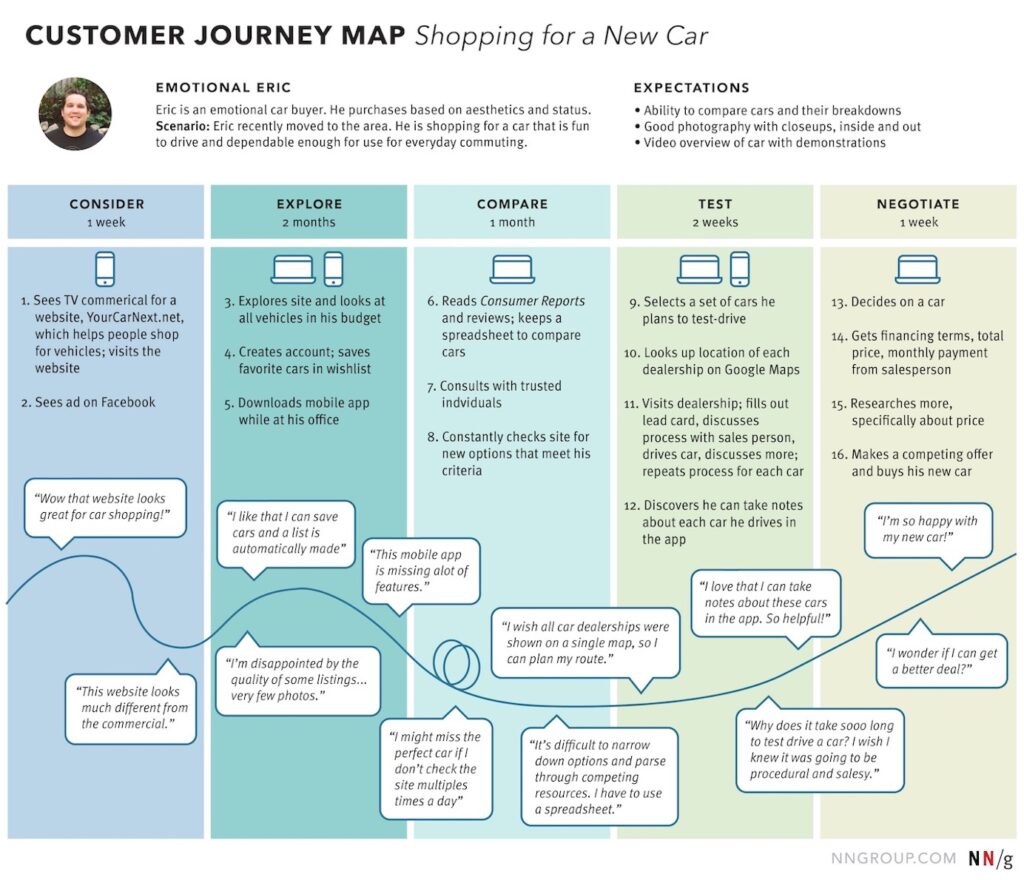
A user journey represents the overall experience that users have with your product across all touchpoints and channels. So, user journey maps, or customer journey maps, capture the entire experience that users have with your product.
When we say the entire experience, we mean it from users discovering your product to them completing the final action.
But user journey maps don’t just visualize the path between a user’s initial contact point and conversion. They also document the user’s actions, thoughts, and feelings that they have as they experience a product.
For that reason, user journey maps are great for systematically analyzing users’ end-to-end experiences. Throughout the user’s journey, you can monitor how your users’ actions, thoughts, and feelings change about the product over time.
This makes it incredibly easy to spot and fix any dips in quality that pertain to the users’ experience.

The Key Components of a User Journey Map
There is no definitively correct way to approach creating a user journey map. Regardless of how you design your journey map, there are key elements that you should always include.
As we did with user flows, we have also explored these key components of user journey maps below.
- Actors represent the users who experience the journey and whose perspective you’ll use to create your journey map.
- Scenarios depict the circumstances that your map will document. These scenarios and the actor’s goals/expectations go hand-in-hand here.
- Journey stages symbolize the different high-level phases in the journey. For example, let’s say you were visualizing an e-commerce scenario, and your actors were buying shoes. The stages would look like discover, try, buy, and use.
- Actions are the actual steps that the user takes across their journey.
- Thoughts & emotions are, of course, what the users think and feel about their experience across the different journey stages.
- Opportunities represent the insights you obtained from journey mapping. You’ll use these opportunities to improve upon your user journey maps.
How To Create a User Journey Map Successfully
With all of this talk of user journey maps, it’s time to learn how to design your own, so keep reading this section if you want to know how to create a user journey map.
1. Defining the Scope
You must start by defining your goals. You need to ask yourself why you’re creating a user journey map in the first place. Ask yourself who your journey map is for and what your ideal outcome is.
For instance, you could use your map to see how new target users feel about the entire end-to-end experience.

2. Finding Your User Personas and Scenarios
To get the most out of your maps, you’ll need to create different ones for specific user types. After all, not all users have the same needs. So, it’s best to create a user persona for each user segment.
Base your user personas on thorough user research, choosing UX research methods that reveal the most valuable insights. We recommend focusing on qualitative and quantitative research methods for your user personas.
After you’ve built your user persona, you can determine the scenario in which to place your user persona. Also, consider the tasks your user persona needs to complete to achieve their goals and find the right scenario.
3. Clarifying the Stages of Your Scenario
Using the scenario you found in the previous step, you’ll define the high-level stages of the user’s journey. These stages will govern the rest of the information you put on your map.
You can use the high-level stages we used in the previous section as an example.
4. Map User Actions, Thoughts, and Emotions
Make a list of all of the user’s actions, thoughts, and feelings for each stage of their journey. You can use questions to convey the user’s thoughts and smiley faces or words to convey the user’s emotions. You could even use fluctuating lines that symbolize the ups and downs within the user’s feedback.
5. Determining Your User’s Initial Contact Points
Now, you need to determine which of your user’s actions led them to find your product. These touchpoints can include anything from social media posts to email campaigns and everything in between.

6. Finding Opportunities
After completing your user journey map, you now need to evaluate its quality. Look for patterns and trends in the user’s thoughts and emotions. Are there any common pain points? Are there any stages that you could improve?
We recommend conducting brainstorming sessions to plan how you and your team will implement the opportunities you found. It’s also a good idea to validate your user journey maps with user feedback.
By testing your maps on real users, you’ll know if your maps reflect reality or not.
User Journey Map vs User Flow Charts: Exploring the Differences
Now that you are familiar with both techniques, it’s time to address the user journey vs. user flow matter.
Below, we’ve listed the differences between user flow charts and user journey maps.
- User journey maps help designers determine the quality of the user’s entire experience with a product. User flows focus on in-product processes and tasks that help users achieve their goals.
- User journeys focus on experiences, thoughts, and emotions, while user flows focus on specific actions and tasks.
- User flow charts are more linear, while user journeys are more complex.
- Designers typically create user flows during the design process. On the other hand, design and product teams will create user journey maps to guide the overarching product strategy.
- User journeys depict a user’s high-level, holistic experience across touchpoints and over a period of time. In contrast, user flows visualize particular micro-interactions that the users make at a specific time while interacting with a product.
User Flow vs User Journey: Final Thoughts
We hope that you feel more confident approaching user flows and user journeys. Both are useful, complementary tools that will help you optimize your users’ experiences.
Speaking of valuable tools, why not consider using Page Flows as your source of design inspiration? Page Flows hosts thousands of screenshots and user flow recordings, documenting common but crucial flows from big-name brands like Google.
From making purchases to general browsing, we make it so that designers don’t have to reinvent the wheel. Instead, with Page Flows, you learn from it, using our resources to become a better designer who creates superior products.
As for the user flow vs user journey matter, we say this: Why not learn to master both? Get started today to learn from the best user flow examples out there!