A UX mockup, like wireframes and prototypes, creates and supports the initial stages of product development.
For that reason, every designer should know the meaning and significance of UX mockups. What’s more, every designer should know where they can find the perfect mockup tool to aid their design processes.
In today’s guide, we’ll reveal everything you need to know about the basics of UX mockups.

What Are Mockups in UX Design?
Naturally, you’ve probably asked, ‘What are mockups in UX design?’
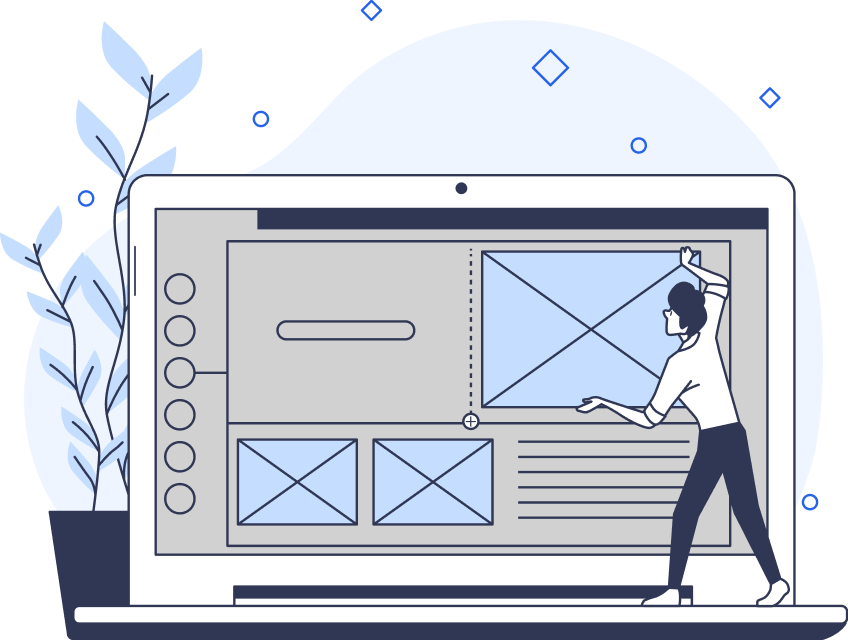
Simply put, a mockup (UX design) is a static wireframe. As a static wireframe, mockups consist of visual elements, providing a realistic perspective of a finalized product.
Put differently, UX mockups are a visual reference for what a finished product will look like.
UX/UI designers can use UX mockups when designing any digital product’s user interface, including web pages and mobile apps.
Here are some of the UI elements that you can expect to see when you encounter a mockup:
- The structure of a screen within the website or app.
- The layout of a screen with a focus on the positioning of UI elements.
- The use of color, including general color schemes.
- Imagery
- Iconography
- Typographic elements

UX Mockups vs Wireframes: What’s the Difference?
Now that you know UX mockups are static wireframes, it’s essential to learn one thing before you read on. UX mockups and wireframes are not the same thing.
Wireframes are low-fidelity sketches of a website or app. Because of this, they typically don’t include copious amounts of detail. Instead, they provide an overview of a website or app’s structure, layout, and information architecture.
Given its focus on the skeletal framework of a digital product, wireframes don’t include the stylistic elements of UI design. What’s more, wireframes won’t reflect the finalized product like a UX mockup would.
Unlike mockups and interactive prototypes, you don’t actually need a design tool to create a wireframe. You can simply develop wireframes using a pencil and paper if you prefer.
Additionally, you should use wireframes to align your team’s goals and ideas concerning the innate functionality of a concept. You should use mockups to help your team decide on the visual direction of your product. However, you can also present mockups to stakeholders for detailed critique.
Most importantly, unlike wireframes, UX mockups will reveal the impact of a product’s visual design from the user’s perspective.

Why Is a UX Mockup Important to the UX Design Process?
Mockups enable the entire design team to understand and communicate what a product’s finalized interfaces should look like.
With mockups, stakeholders can review the final look of a product and offer meaningful feedback before further development.
What’s more, since mockups contain more detail than wireframes, they can reveal areas of refinement that wireframes can’t.
Ultimately, mockups allow designers to experiment with visual elements before the finalized product undergoes development, saving time and money.
How To Create a Screen Mockup
You now know the meaning and significance of mockups; you now need to understand how to create screen mockups.
A screen mockup is simply a mockup of any screen/user interface that exists within a website or application. Below, you’ll learn how to create one.
1. Choosing Your Mockup Tool
Your first task is to find a suitable mockup tool for your objectives. There is an abundance of online mockup tools available, including Figma and Balsamiq.
The tool you choose will largely depend on your preferences. For instance, you could prioritize your budgetary restrictions over using advanced features.
We’ll briefly discuss some mockup tools in more depth. In the meantime, you should assess your goals and consider what features and functions you’ll need to achieve them.
2. Creating a Wireframe
Regardless of whether you intend to work on a website or mobile application, it’s best to create wireframes first.
Creating a low-fidelity wireframe is a great way to consolidate the initial concepts from your ideation phase. What’s more, your wireframe will serve as the foundation for your mockup.
After creating your wireframe, you can test and validate your ideas early on in the design process. By doing so, you can rapidly make iterations and improvements before you progress to the next step.
Overall, at this stage, you should focus your efforts on aligning your team’s goals. In other words, by unifying your team during the wireframing stage, you can streamline the creation of your upcoming mockups.
3. Elevating Your Wireframe
After you’ve created your wireframes, the next step is to elevate them.
Specifically, it’s time to edit your designs, incorporating vital visual elements that will shape the user’s experience. Consider the colors, icons, images, and fonts that you need to make your user interface engaging for your users.
While the use of user-centric design elements is crucial, it’s equally important to consider your brand’s theme and personality.
At this stage, your goal is straightforward. Show your stakeholders that you can utilize UI design elements to enhance the user’s experience and establish brand consistency.
Then, you can arrange and organize the elements you’ve edited to allow for seamless navigation, understandable visual hierarchy, and accessibility.
4. Collaborating With Fellow Designers
As you make continuous edits to your mockups, it’s wise to collaborate with your design team.
Sharing your designs with your team means that everyone can participate in the design process, exchanging valuable insights and perspectives. Your team can help you make the improvements that your designs may need before the design handoff.
Additionally, through collaboration, you’ll likely find it much easier to reach the final iteration of your mockup quickly.
Regardless of whether you collaborate with other designers or not, it’s vital to consider the user’s journey consistently. Ask yourself how your use of UI design will impact the ease of the user’s navigation.
Ultimately, although UX mockups focus heavily on visual elements, you must ensure they are functional.
Once you’re happy with your edits, you can begin transforming your mockup into an interactive prototype.
Now, we can focus on dashboard mockups…
What Is a Dashboard Mockup?
Before we discuss what dashboard mockups are, it’s handy to know what dashboard design is.
Dashboard UX design refers to the combination and organization of different metrics, controls, and data visualizations.
UX designers will centralize these various insights in a singular user interface. By doing so, designers can present the most essential information to the user in a digestible way. Dashboard design also allows designers to provide their users with the tools to explore said information intuitively.
Thus, a dashboard mockup serves as a prototype of a finalized analytics dashboard. Instead of feeding live dashboards into your product, you can create a dashboard mockup with placeholder data.
A dashboard mockup allows you to test the new features of your dashboard in a timely and cost-effective manner. What’s more, you can receive valuable feedback and validation on a new feature before production starts.

How To Create a Dashboard Mockup
Below, we’ve revealed how you can create a dashboard mockup—it’s easier and quicker than you think.
1. Clarifying Your Objectives
Before you create a dashboard mockup, it’s best to outline your goals.
You may want to improve your dashboard with a new feature or validate an idea. Either way, it’s wise to start your mockups with a clear sense of direction.
You should also consider which data sources you’ll use, your target audience, and how they will use your dashboard.
By doing so, you’ll ensure that your dashboard meets your users’ needs.
2. Selecting Your Tools
Then, like you would with a screen mockup, you should select your mockup tools.
Remember to consider your goals, limitations, and preferences when choosing your tools.
3. Create a Dashboard Wireframe
Again, similar to a screen mockup, it’s best to create a dashboard wireframe before you design anything else.
Focus your wireframes around your dashboard’s layout, structure, and content.
We recommend using a simple grid system to ensure your dashboard design mockups are consistent and understandable.
4. Enhancing Your Dashboard’s Interface
Now, you can expand upon and edit your initial dashboard wireframe. Consider the visual elements we’ve discussed in the previous sections, like color, fonts, and images.
Given that you’re working on a dashboard, you should also consider how you’ll design your tables, graphs, and other visualizations.
Keep your goals in mind as you design. You want to create a visually appealing dashboard that allows for a smooth, intuitive user experience.
If you find it challenging to enhance your dashboard wireframe, consider using a dashboard template.
5. Testing and Refining Your Mockups
When you’ve finished editing your mockup, you can conduct usability tests with your users.
Once you’ve received feedback from your users, you can use it to refine the next iteration of your dashboard mockup.
After you’ve perfected your iterations, you can launch your dashboard!
What To Look for In a UX Mockup Tool
Knowing how to create some of the most basic mockups is a valuable skill. Another equally important skill is knowing how to spot the perfect UX mockup tool.
Below, we’ve revealed some features that the best UX mockup tools have to help you find the right tool.
1. Collaboration
Gaining feedback from other designers and stakeholders is crucial when validating your mockups. The best mockup tools have collaboration features that streamline the ideation phase.
2. Cost
If you have a tight budget, then you should look for tools that offer free trials, free packages, and special discounts. The best mockup tools have basic and standard versions of their more advanced features and will still accommodate your needs.

3. Convenience
If you face strict time constraints or simply lack inspiration, the best mockup tools will offer helpful features. Specifically, the best mockup tools will offer ready-to-use templates, component libraries, and UI kits.
Free Mockups: Finding the Right Tools for Free
It’s time to look at how you can create mockups regardless of your budgetary restrictions. It’s simple – you just need access to a free mockup tool.
Below, we’ve listed some of the mockup tools with the best free packages that you should consider using.
A Website Mockup Creator: Streamlining Your Mockups
When in doubt, you can also use a website mockup creator.
To help you find a suitable mockup creator, we’ve listed some of the best website mockup creators below.
The Mockups of UX Design: Final Thoughts
Mockups can prove a valuable tool to designers who are testing out the visual aspects of their products.
By testing visual elements in your mockups, you can find new inspiration for an even better idea.
Speaking of inspiration, why not learn what a visually appealing, finalized product looks like? Meet Page Flows.
Page Flows hosts over 5,100 recordings of successful user flows from esteemed brands like Sonos and Booking.com. We also collect emails when we record user flows.
Ultimately, this means that you’ll know what a seamless user flow looks like. What’s more, you’ll learn how to interact with users as they progress through said seamless user flows.
Don’t reinvent the wheel of UX design – create consistently successful, user-centric products with Page Flows.
Like a UX mockup, we know how to combine visual appeal with functionality…over 1,000 customers can vouch for us!
Get started today to learn more about visually intriguing user flows and engaging emails!
